Data Dump
The supOS platform provides database dump to offer easy access for third_party systems to the real-time industrial data.
- Log in to supOS, and then click
 at the upper-right corner to go to the design center.
 - Add a data source from Storage Resources > Resources Management to be the target database.info
For details, see Adding Data Source.
- Select Task Management > Live Data Dump, and then click New Task.
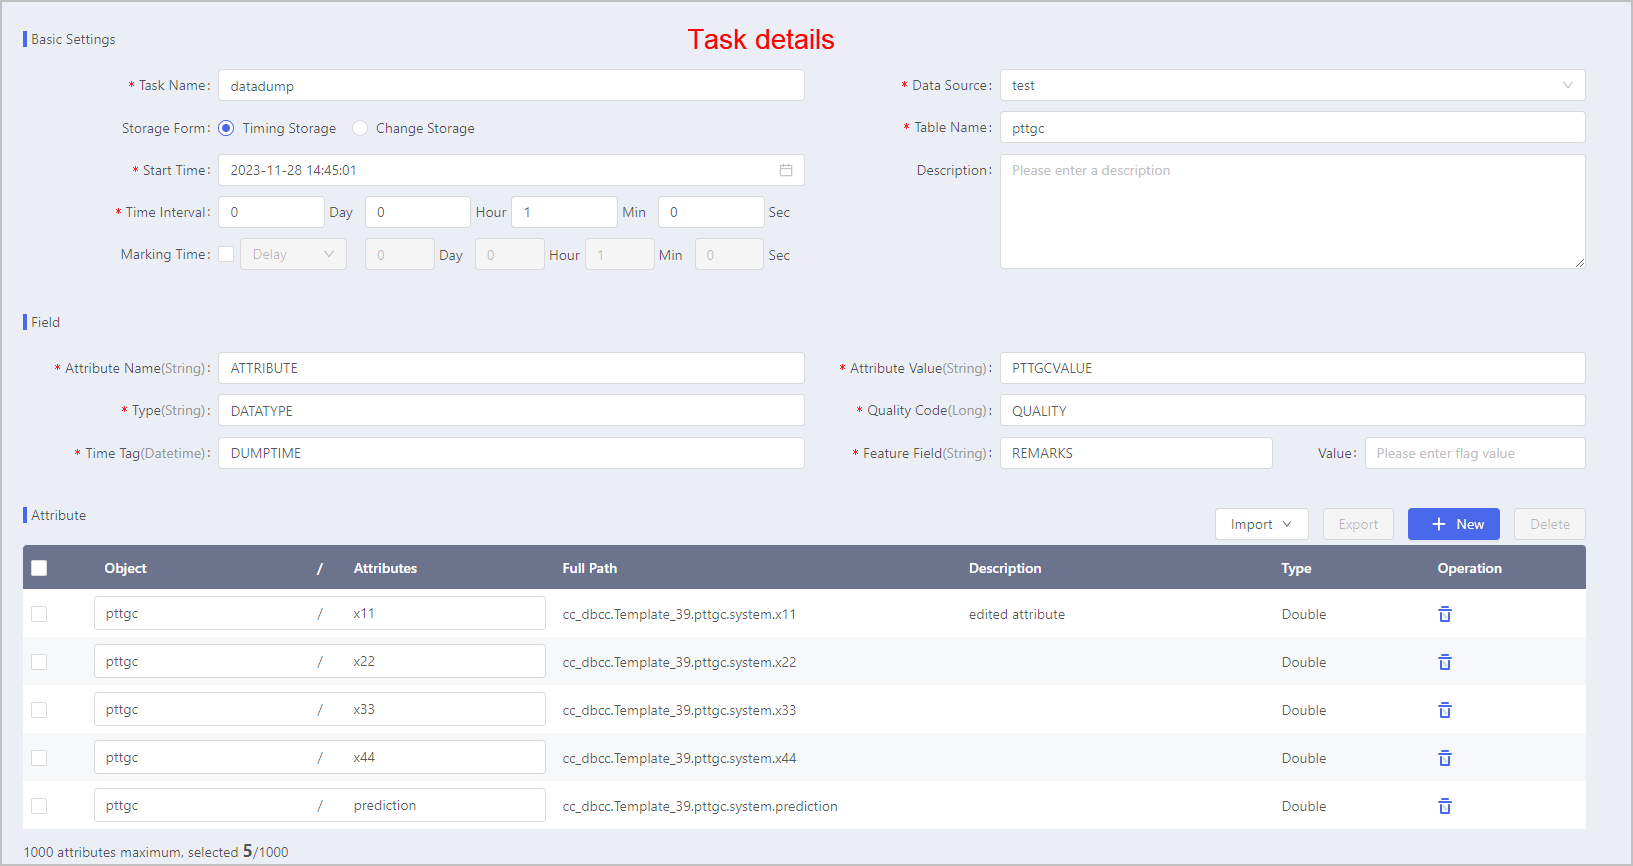
- Enter the information of the task.
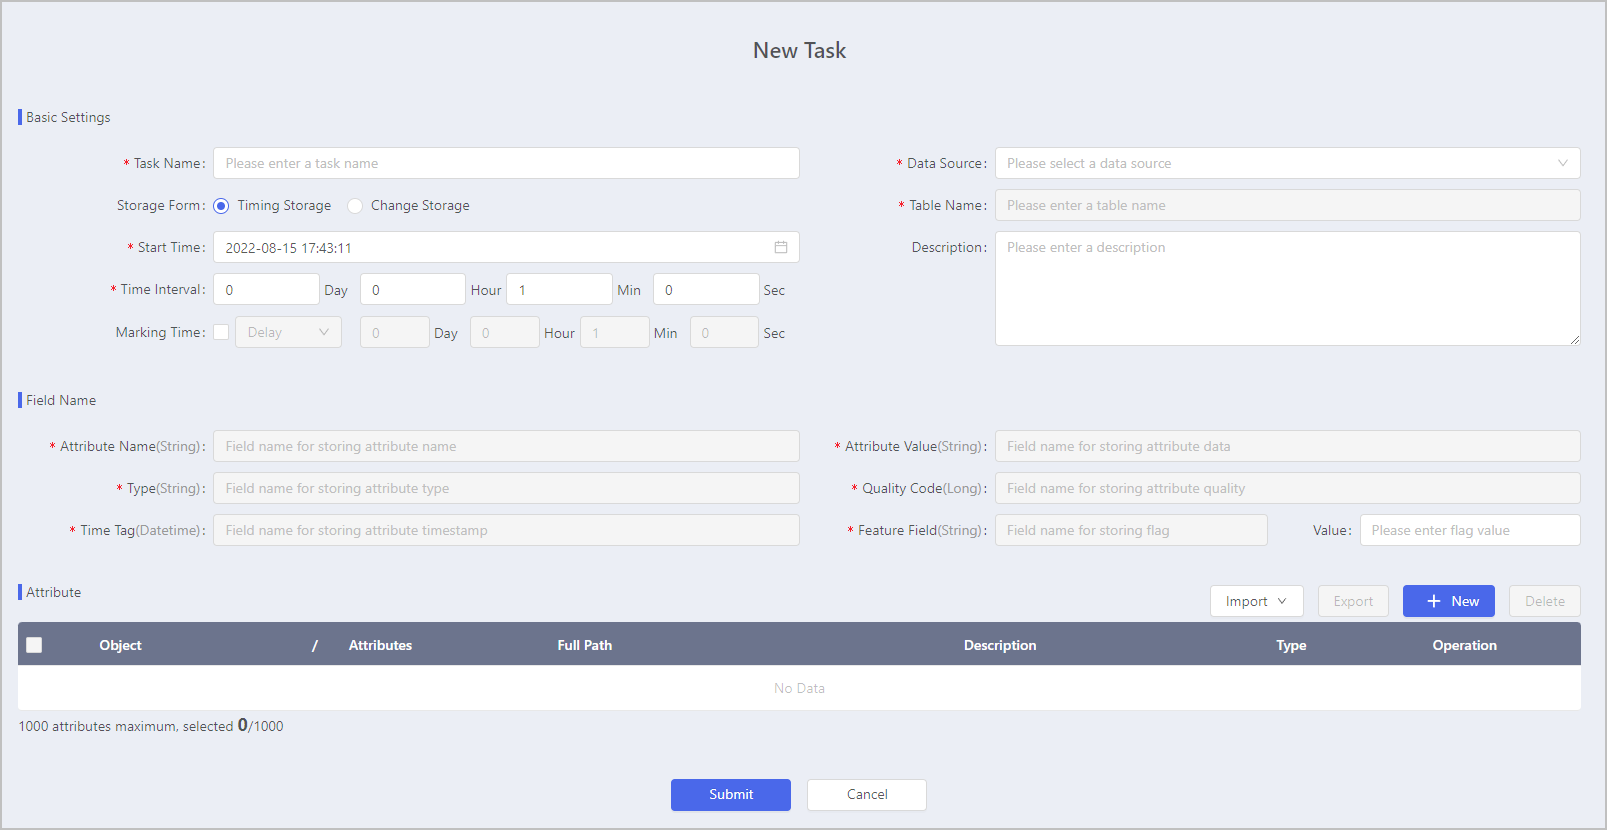
| Parameter | Description | |
|---|---|---|
| Basic | Data Source | Select the data source of the database dump task. |
| Storage Form |
| |
| Table Name |
| |
| Start Time | Set the begin time and interval of the data dump task. info Only available when Timing Storage is set as the Storage Form. | |
| Interval | ||
| Marking Time | Enable and set the Marking Time. For example, set the label time to be one hour delay, and the timestamp in the database after the dump is displayed as one hour later than the actual dumping time. | |
| Field | Attribute Name | Set the name of the field which represents the selected attribute name. |
| Type | Set the name of the field which represents the selected attribute data type. | |
| Time Tag | Set the name of the field which represents the timestamp when the data is transferred. | |
| Attribute Value | Set the name of the field which represents the selected attribute value. | |
| Quality Code | Set the name of the field which represents the quality of the transferred data. | |
| Feature Field | Set the name of the field which is used to be extension field on the table. | |
| Attribute | The object attributes which need to be saved to the database. | |
- Under Attribute, click New to select object attributes, and then click Save.
info
- Up to 1000 attributes can be added.
- To add attributes to another task, we recommend to export attributes and then import to another task. You can also download a template, and enter the attribute information (Object and Attribute are required) before import.
- Click Submit.
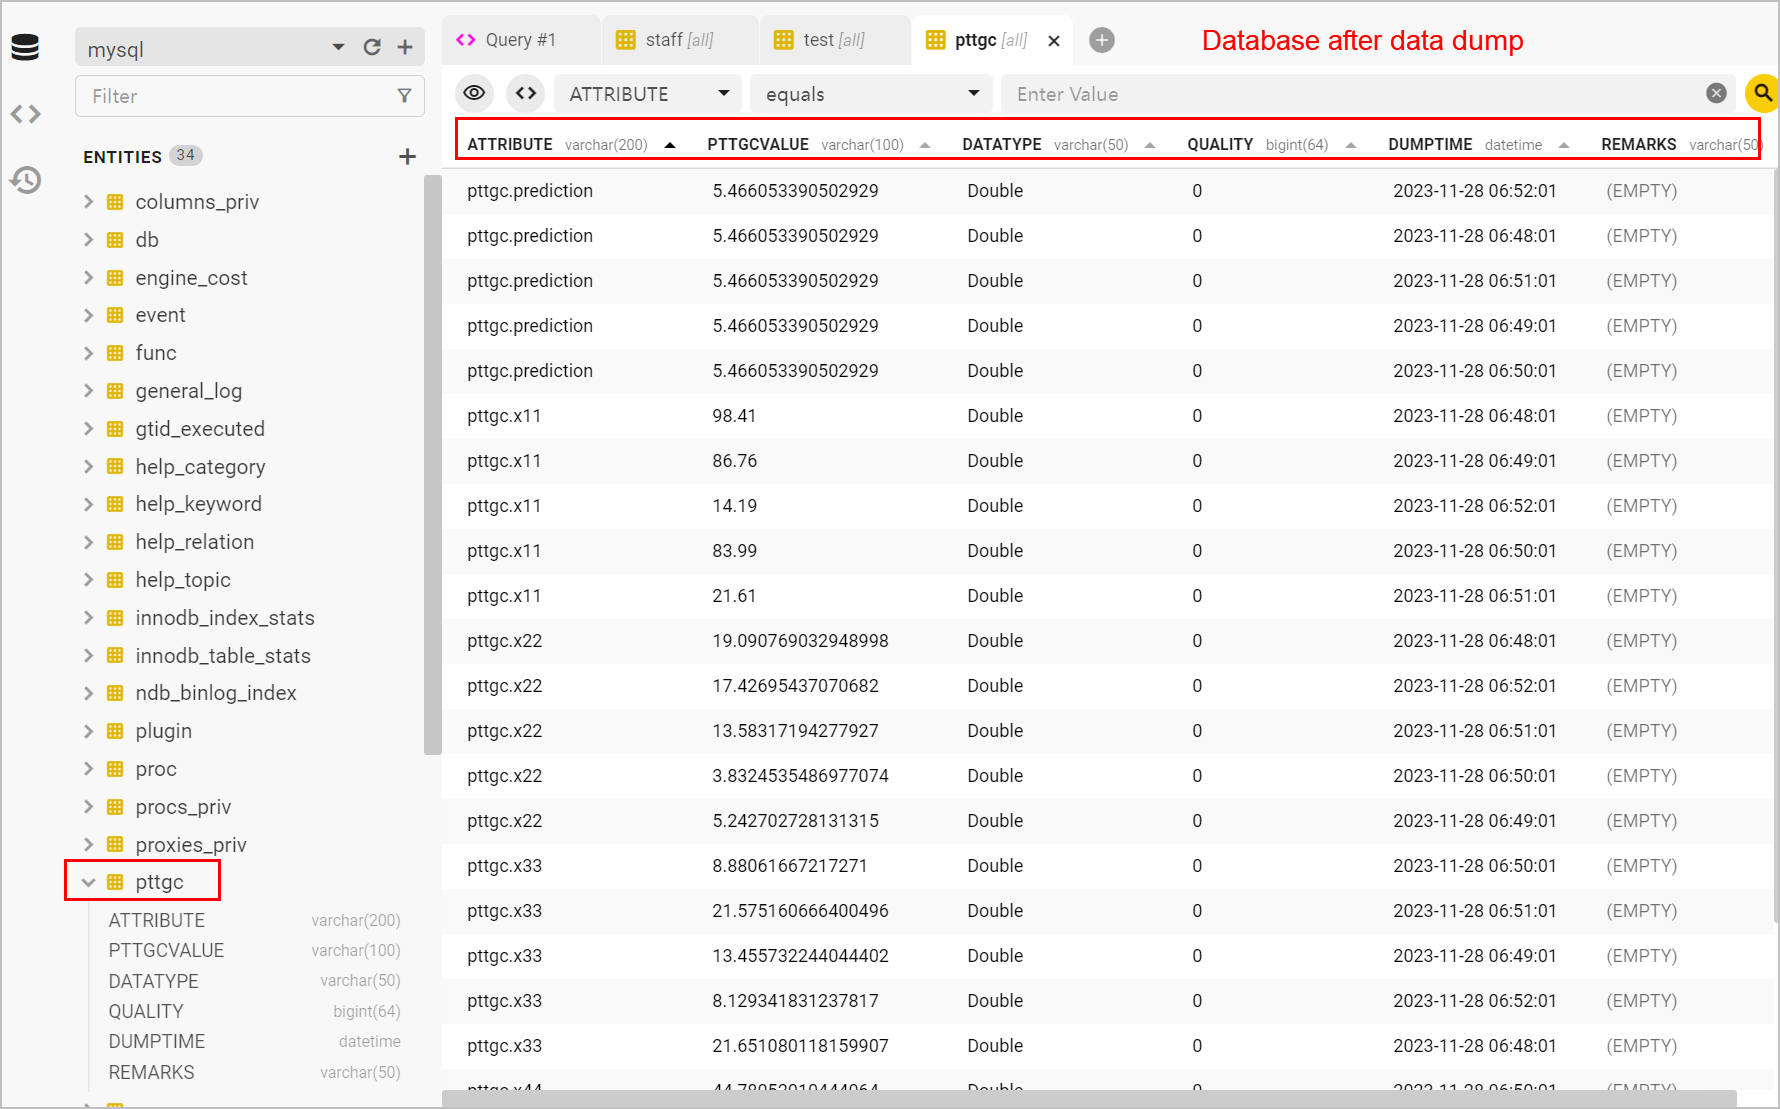
- Log in to the target database, and check whether the task is successfully executed.